


【精选】全开源仿抖音商城 diy商城系统,Saas版本源码详细搭建教程

源码获取:ym7k.com/17789/
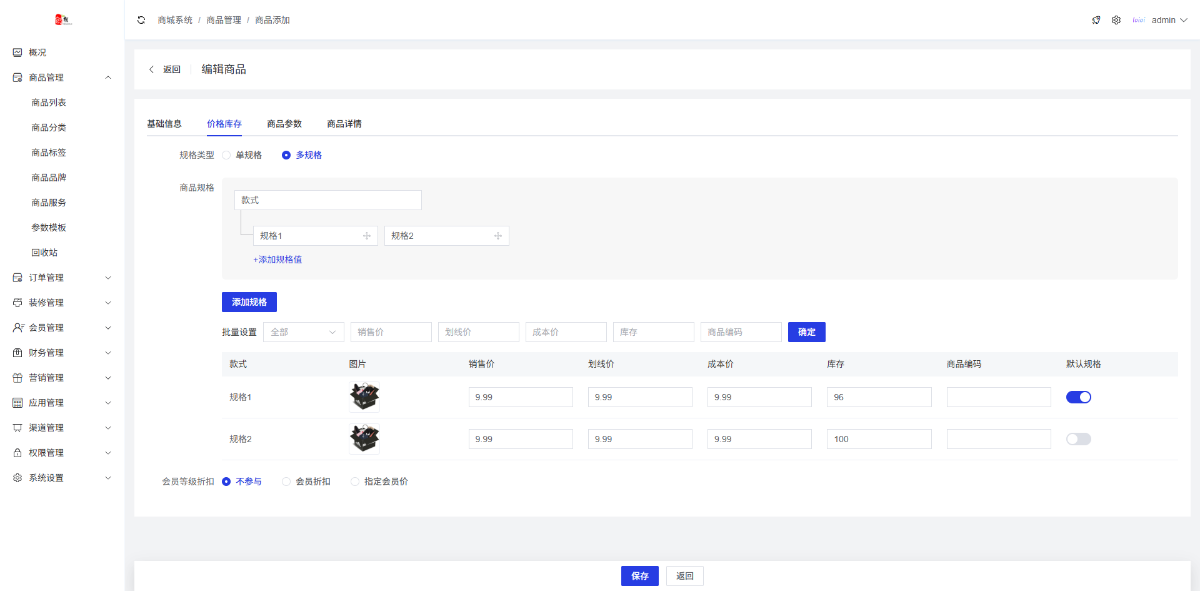
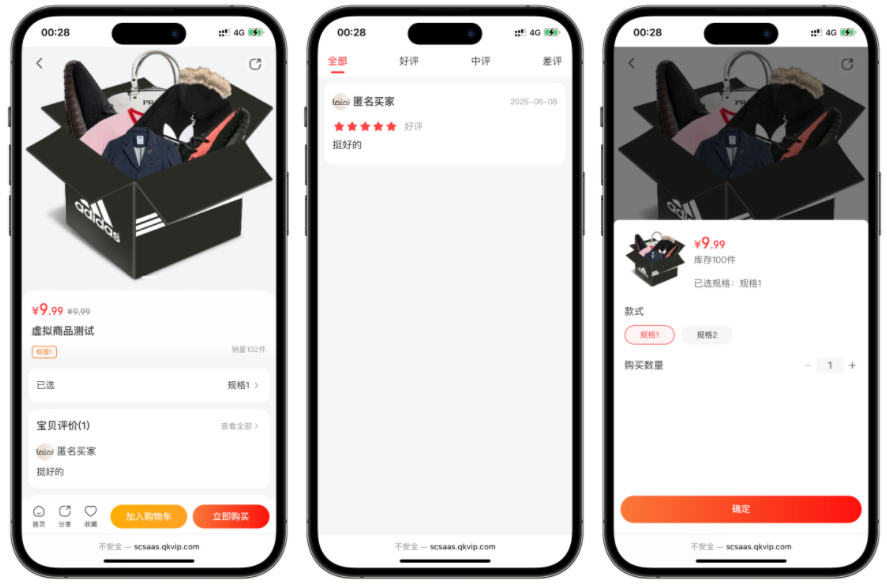
全开源仿抖音 DIY 商城 SaaS 系统:多存储引擎与可视化装修的工程架构
引子:DIY 装修与云存储,两个被低估的工程模块
一个仿抖音形态的 DIY 商城 SaaS 系统,产品描述中最吸引眼球的是"短视频""种草""直播"。但真正决定系统可用性和可扩展性的,往往是两个看起来不起眼的模块:可视化装修(DIY) 和多存储引擎支持。
DIY 装修决定了商户能否在不写代码的前提下,自定义商城的首页、分类页、详情页布局。它是 SaaS 系统的核心竞争力之一——如果每个商户的商城都要开发者手动改模板,SaaS 的规模效应就不存在了。
多存储引擎支持决定了系统能否适配不同规模的商户。小商户用本地存储就够了,中等商户需要七牛云或阿里云 OSS 的 CDN 加速,大商户可能需要腾讯云 COS 的跨区域容灾。如果系统只支持一种存储,商户的迁移成本会非常高。
这两个模块的工程复杂度,与短视频和直播相当,甚至更高。因为它们涉及跨租户的配置管理、跨云服务的 API 抽象、跨终端的渲染一致性。
本文从 SaaS 多租户架构、可视化 DIY 的数据模型、多存储引擎的抽象层、存储配置的租户隔离,到完整的源码搭建流程,展开这类系统的技术分析。
一、SaaS 多租户架构:无限开的技术底座
1.1 租户隔离的三个层次
仿抖音 DIY 商城的 SaaS 版本,需要同时处理三层隔离。
数据隔离。 每个商户的商品、订单、用户、内容互不可见。这是最基础的隔离,通过 tenant_id 字段在数据库层面实现。
配置隔离。 每个商户的商城名称、Logo、主题色、存储配置、支付配置都是独立的。这需要在配置表中按租户维度存储。
资源隔离。 每个商户的图片、视频、文档存储在独立的目录或 Bucket 中。这需要在存储层面按租户维度隔离。
CREATE TABLE `tenant` (
  `id` int(11) NOT NULL AUTO_INCREMENT,
  `code` varchar(32) NOT NULL COMMENT '租户唯一标识',
  `name` varchar(100) NOT NULL COMMENT '商城名称',
  `domain` varchar(100) DEFAULT NULL COMMENT '独立域名',
  `mini_appid` varchar(64) DEFAULT NULL,
  `mini_secret` varchar(128) DEFAULT NULL,
  `logo` varchar(255) DEFAULT NULL,
  `theme` text COMMENT '主题配置JSON',
  `storage_config` text COMMENT '存储配置JSON',
  `payment_config` text COMMENT '支付配置JSON',
  `expire_at` datetime DEFAULT NULL,
  `status` tinyint(1) NOT NULL DEFAULT '1',
  `created_at` datetime NOT NULL DEFAULT CURRENT_TIMESTAMP,
  PRIMARY KEY (`id`),
  UNIQUE KEY `uk_code` (`code`),
  UNIQUE KEY `uk_domain` (`domain`)
) ENGINE=InnoDB DEFAULT CHARSET=utf8mb4;
storage_config 字段用 JSON 存储该租户的存储配置,这是多存储引擎支持的核心。
1.2 租户识别与上下文注入
用户访问商城时,系统需要识别"这是哪个商户的商城",并注入租户上下文。
<?php
// app/common/middleware/TenantMiddleware.php

namespace app\common\middleware;

use think\facade\Db;
use think\Request;

class TenantMiddleware
{
    public function handle(Request $request, \Closure $next)
    {
        $tenant = $this->resolveTenant($request);

        if (!$tenant) {
            return json(['code' => 404, 'msg' => '商城不存在']);
        }

        // 注入租户上下文
        app()->bind('tenant_id', $tenant['id']);
        app()->bind('tenant', $tenant);

        return $next($request);
    }

    protected function resolveTenant(Request $request): ?array
    {
        // 1. 独立域名
        $host = $request->host(true);
        $tenant = Db::name('tenant')->where('domain', $host)->find();
        if ($tenant) return $tenant;

        // 2. 小程序 AppID
        $appid = $request->header('X-Mini-Appid');
        if ($appid) {
            $tenant = Db::name('tenant')->where('mini_appid', $appid)->find();
            if ($tenant) return $tenant;
        }

        // 3. 请求头租户标识
        $code = $request->header('X-Tenant-Code') ?: $request->param('tenant_code');
        if ($code) {
            return Db::name('tenant')->where('code', $code)->find();
        }

        return null;
    }
}
二、可视化 DIY:页面装修的数据模型
2.1 DIY 的核心思想
可视化 DIY 装修的核心思想是:将页面结构抽象为 JSON 配置,前端根据配置动态渲染,商户通过拖拽编辑器修改配置。
这个思想的关键在于组件化。页面由一系列预定义的组件(轮播图、导航、商品列表、视频流、图文广告)组成。商户拖拽组件、调整顺序、修改参数,系统保存配置,前端渲染。
2.2 页面配置的数据模型
CREATE TABLE `page` (
  `id` int(11) NOT NULL AUTO_INCREMENT,
  `tenant_id` int(11) NOT NULL,
  `name` varchar(100) NOT NULL COMMENT '页面名称',
  `type` varchar(20) NOT NULL COMMENT 'home/category/detail/custom',
  `terminal` varchar(10) NOT NULL DEFAULT 'all' COMMENT '适用终端:all/mp/h5/app',
  `components` longtext NOT NULL COMMENT '组件配置JSON',
  `is_default` tinyint(1) NOT NULL DEFAULT '0',
  `status` tinyint(1) NOT NULL DEFAULT '1',
  `created_at` datetime NOT NULL DEFAULT CURRENT_TIMESTAMP,
  `updated_at` datetime NOT NULL DEFAULT CURRENT_TIMESTAMP ON UPDATE CURRENT_TIMESTAMP,
  PRIMARY KEY (`id`),
  KEY `idx_tenant_type` (`tenant_id`, `type`),
  KEY `idx_terminal` (`terminal`)
) ENGINE=InnoDB DEFAULT CHARSET=utf8mb4;
components 字段存储页面的组件配置。它的 JSON 结构如下:
{
  "version": "1.0",
  "background": "#f5f5f5",
  "components": [
    {
      "id": "comp_banner_1",
      "type": "banner",
      "sort": 1,
      "config": {
        "height": 320,
        "radius": 12,
        "items": [
          {
            "image": "https://cdn.example.com/banner1.jpg",
            "link": "/pages/goods/detail?id=1",
            "linkType": "goods"
          }
        ]
      }
    },
    {
      "id": "comp_nav_1",
      "type": "nav_grid",
      "sort": 2,
      "config": {
        "columns": 5,
        "rows": 2,
        "items": [
          {"icon": "/uploads/icon_seckill.png", "text": "秒杀", "link": "/pages/seckill/index"},
          {"icon": "/uploads/icon_group.png", "text": "拼团", "link": "/pages/group/index"}
        ]
      }
    },
    {
      "id": "comp_video_1",
      "type": "video_feed",
      "sort": 3,
      "config": {
        "title": "种草视频",
        "source": "recommend",
        "limit": 6,
        "layout": "double_column"
      }
    }
  ]
}
2.3 组件注册表
前端需要知道每种组件如何渲染。这通过一个组件注册表实现。
// components/diy/registry.js

import BannerComponent from './components/Banner.vue';
import NavGridComponent from './components/NavGrid.vue';
import GoodsListComponent from './components/GoodsList.vue';
import VideoFeedComponent from './components/VideoFeed.vue';
import NoticeComponent from './components/Notice.vue';
import CouponComponent from './components/Coupon.vue';
import LiveComponent from './components/Live.vue';

export const componentRegistry = {
  banner: {
    name: '轮播图',
    component: BannerComponent,
    defaultConfig: {
      height: 320,
      radius: 12,
      items: [],
    },
  },
  nav_grid: {
    name: '导航宫格',
    component: NavGridComponent,
    defaultConfig: {
      columns: 5,
      rows: 2,
      items: [],
    },
  },
  goods_list: {
    name: '商品列表',
    component: GoodsListComponent,
    defaultConfig: {
      title: '精选商品',
      source: 'recommend',
      limit: 10,
      layout: 'grid',
    },
  },
  video_feed: {
    name: '视频流',
    component: VideoFeedComponent,
    defaultConfig: {
      title: '种草视频',
      source: 'recommend',
      limit: 6,
      layout: 'double_column',
    },
  },
  notice: {
    name: '公告',
    component: NoticeComponent,
    defaultConfig: {
      text: '欢迎光临本店',
      scroll: true,
    },
  },
  coupon: {
    name: '优惠券',
    component: CouponComponent,
    defaultConfig: {
      couponIds: [],
    },
  },
  live: {
    name: '直播',
    component: LiveComponent,
    defaultConfig: {
      roomIds: [],
      layout: 'grid',
    },
  },
};
2.4 动态渲染器
前端页面根据 components 配置动态渲染。核心逻辑是遍历组件列表,根据 type 从注册表中查找对应的组件,并传入 config。
<!-- pages/index/index.vue -->
<template>
  <view class="diy-page" :style="{ background: pageConfig.background }">
    <block v-for="comp in sortedComponents" :key="comp.id">
      <component
        :is="getComponent(comp.type)"
        :config="comp.config"
        :tenant-id="tenantId"
        @navigate="onNavigate"
      />
    </block>
  </view>
</template>

<script>
import { componentRegistry } from '@/components/diy/registry';

export default {
  data() {
    return {
      pageConfig: { background: '#f5f5f5', components: [] },
      tenantId: null,
    };
  },
  computed: {
    sortedComponents() {
      return [...this.pageConfig.components].sort((a, b) => a.sort - b.sort);
    },
  },
  onLoad() {
    this.tenantId = uni.getStorageSync('tenant_id');
    this.loadPage();
  },
  methods: {
    async loadPage() {
      const res = await this.$api.page.getHome({
        tenant_id: this.tenantId,
      });
      this.pageConfig = res.data;
    },
    getComponent(type) {
      const entry = componentRegistry[type];
      return entry ? entry.component : null;
    },
    onNavigate(url) {
      if (url) uni.navigateTo({ url });
    },
  },
};
</script>
这个动态渲染器的核心设计是组件注册表 + 动态组件。前端不需要硬编码每种组件的渲染逻辑,而是通过 componentRegistry 查找。新增组件只需要在注册表中添加一行,不需要修改页面代码。
2.5 终端适配
同一个页面配置在不同终端上可能需要不同的渲染方式。例如,导航宫格在移动端是 5 列,在 PC 端可能是 3 列。系统通过终端适配层处理这些差异。
// components/diy/adapter.js

export function adaptComponents(components, terminal) {
  return components.map(comp => {
    const adapted = JSON.parse(JSON.stringify(comp));

    if (terminal === 'pc') {
      // PC 端调整列数
      if (comp.type === 'nav_grid') {
        adapted.config.columns = Math.min(comp.config.columns || 5, 4);
      }
      // PC 端调整视频流布局
      if (comp.type === 'video_feed') {
        adapted.config.layout = 'grid';
        adapted.config.columns = 4;
      }
    }

    if (terminal === 'mp') {
      // 小程序端限制轮播高度
      if (comp.type === 'banner') {
        adapted.config.height = Math.min(comp.config.height || 320, 400);
      }
    }

    return adapted;
  });
}

export function detectTerminal() {
  // #ifdef MP-WEIXIN
  return 'mp';
  // #endif

  // #ifdef H5
  const ua = navigator.userAgent;
  if (/MicroMessenger/i.test(ua)) return 'oa';
  if (!/Android|iPhone|iPad|Mobile/i.test(ua)) return 'pc';
  return 'h5';
  // #endif

  // #ifdef APP-PLUS
  return 'app';
  // #endif
}
三、多存储引擎:本地、七牛云、阿里云、腾讯云
3.1 存储引擎的抽象层
多存储引擎的核心是统一接口 + 具体实现。系统定义一个 StorageInterface,本地存储、七牛云、阿里云 OSS、腾讯云 COS 分别实现这个接口。
<?php
// app/common/storage/StorageInterface.php

namespace app\common\storage;

interface StorageInterface
{
    /**
     * 上传文件
     * @param string $localPath 本地文件路径
     * @param string $remotePath 远程存储路径
     * @return string 访问 URL
     */
    public function upload(string $localPath, string $remotePath): string;

    /**
     * 删除文件
     * @param string $remotePath 远程存储路径
     * @return bool
     */
    public function delete(string $remotePath): bool;

    /**
     * 获取文件访问 URL
     * @param string $remotePath 远程存储路径
     * @return string
     */
    public function url(string $remotePath): string;

    /**
     * 检查文件是否存在
     * @param string $remotePath 远程存储路径
     * @return bool
     */
    public function exists(string $remotePath): bool;
}
3.2 本地存储实现
<?php
// app/common/storage/LocalStorage.php

namespace app\common\storage;

class LocalStorage implements StorageInterface
{
    protected $basePath;
    protected $baseUrl;

    public function __construct(array $config)
    {
        $this->basePath = $config['base_path'] ?? app()->getRootPath() . 'public/uploads';
        $this->baseUrl = $config['base_url'] ?? '/uploads';
    }

    public function upload(string $localPath, string $remotePath): string
    {
        $target = $this->basePath . '/' . ltrim($remotePath, '/');
        $dir = dirname($target);

        if (!is_dir($dir)) {
            mkdir($dir, 0755, true);
        }

        if (!copy($localPath, $target)) {
            throw new \Exception('文件保存失败');
        }

        return $this->url($remotePath);
    }

    public function delete(string $remotePath): bool
    {
        $target = $this->basePath . '/' . ltrim($remotePath, '/');
        return file_exists($target) && unlink($target);
    }

    public function url(string $remotePath): string
    {
        return rtrim($this->baseUrl, '/') . '/' . ltrim($remotePath, '/');
    }

    public function exists(string $remotePath): bool
    {
        return file_exists($this->basePath . '/' . ltrim($remotePath, '/'));
    }
}
3.3 七牛云存储实现
<?php
// app/common/storage/QiniuStorage.php

namespace app\common\storage;

use Qiniu\Auth;
use Qiniu\Storage\UploadManager;
use Qiniu\Storage\BucketManager;

class QiniuStorage implements StorageInterface
{
    protected $accessKey;
    protected $secretKey;
    protected $bucket;
    protected $domain;
    protected $auth;

    public function __construct(array $config)
    {
        $this->accessKey = $config['access_key'];
        $this->secretKey = $config['secret_key'];
        $this->bucket = $config['bucket'];
        $this->domain = rtrim($config['domain'], '/');
        $this->auth = new Auth($this->accessKey, $this->secretKey);
    }

    public function upload(string $localPath, string $remotePath): string
    {
        $token = $this->auth->uploadToken($this->bucket);
        $uploadMgr = new UploadManager();

        [$ret, $err] = $uploadMgr->putFile(
            $token,
            ltrim($remotePath, '/'),
            $localPath
        );

        if ($err !== null) {
            throw new \Exception('七牛云上传失败: ' . json_encode($err));
        }

        return $this->url($remotePath);
    }

    public function delete(string $remotePath): bool
    {
        $bucketMgr = new BucketManager($this->auth);
        [$ret, $err] = $bucketMgr->delete(
            $this->bucket,
            ltrim($remotePath, '/')
        );

        return $err === null;
    }

    public function url(string $remotePath): string
    {
        return $this->domain . '/' . ltrim($remotePath, '/');
    }

    public function exists(string $remotePath): bool
    {
        $bucketMgr = new BucketManager($this->auth);
        [$ret, $err] = $bucketMgr->stat(
            $this->bucket,
            ltrim($remotePath, '/')
        );
        return $err === null;
    }
}
3.4 阿里云 OSS 实现
<?php
// app/common/storage/AliyunOssStorage.php

namespace app\common\storage;

use OSS\OssClient;
use OSS\Core\OssException;

class AliyunOssStorage implements StorageInterface
{
    protected $client;
    protected $bucket;
    protected $domain;

    public function __construct(array $config)
    {
        $this->bucket = $config['bucket'];
        $this->domain = rtrim($config['domain'], '/');

        try {
            $this->client = new OssClient(
                $config['access_key_id'],
                $config['access_key_secret'],
                $config['endpoint']
            );
        } catch (OssException $e) {
            throw new \Exception('阿里云 OSS 初始化失败: ' . $e->getMessage());
        }
    }

    public function upload(string $localPath, string $remotePath): string
    {
        try {
            $this->client->uploadFile(
                $this->bucket,
                ltrim($remotePath, '/'),
                $localPath
            );
        } catch (OssException $e) {
            throw new \Exception('阿里云 OSS 上传失败: ' . $e->getMessage());
        }

        return $this->url($remotePath);
    }

    public function delete(string $remotePath): bool
    {
        try {
            $this->client->deleteObject(
                $this->bucket,
                ltrim($remotePath, '/')
            );
            return true;
        } catch (OssException $e) {
            return false;
        }
    }

    public function url(string $remotePath): string
    {
        return $this->domain . '/' . ltrim($remotePath, '/');
    }

    public function exists(string $remotePath): bool
    {
        try {
            return $this->client->doesObjectExist(
                $this->bucket,
                ltrim($remotePath, '/')
            );
        } catch (OssException $e) {
            return false;
        }
    }
}
3.5 腾讯云 COS 实现
<?php
// app/common/storage/TencentCosStorage.php

namespace app\common\storage;

use Qcloud\Cos\Client;

class TencentCosStorage implements StorageInterface
{
    protected $client;
    protected $bucket;
    protected $region;
    protected $domain;

    public function __construct(array $config)
    {
        $this->bucket = $config['bucket'];
        $this->region = $config['region'];
        $this->domain = rtrim($config['domain'], '/');

        $this->client = new Client([
            'region' => $this->region,
            'credentials' => [
                'secretId' => $config['secret_id'],
                'secretKey' => $config['secret_key'],
            ],
        ]);
    }

    public function upload(string $localPath, string $remotePath): string
    {
        $this->client->upload(
            $this->bucket,
            ltrim($remotePath, '/'),
            fopen($localPath, 'rb')
        );

        return $this->url($remotePath);
    }

    public function delete(string $remotePath): bool
    {
        try {
            $this->client->deleteObject([
                'Bucket' => $this->bucket,
                'Key' => ltrim($remotePath, '/'),
            ]);
            return true;
        } catch (\Exception $e) {
            return false;
        }
    }

    public function url(string $remotePath): string
    {
        return $this->domain . '/' . ltrim($remotePath, '/');
    }

    public function exists(string $remotePath): bool
    {
        try {
            return $this->client->doesObjectExist(
                $this->bucket,
                ltrim($remotePath, '/')
            );
        } catch (\Exception $e) {
            return false;
        }
    }
}
3.6 存储工厂:按租户配置创建实例
存储引擎的实例化通过工厂模式完成。工厂从租户配置中读取存储类型,创建对应的实例。
<?php
// app/common/storage/StorageFactory.php

namespace app\common\storage;

class StorageFactory
{
    /**
     * 根据租户配置创建存储实例
     */
    public static function make(?int $tenantId = null): StorageInterface
    {
        if ($tenantId === null) {
            $tenantId = app('tenant_id') ?? 0;
        }

        // 获取租户的存储配置
        $config = self::getConfig($tenantId);
        $driver = $config['driver'] ?? 'local';

        switch ($driver) {
            case 'local':
                return new LocalStorage($config);
            case 'qiniu':
                return new QiniuStorage($config);
            case 'aliyun':
                return new AliyunOssStorage($config);
            case 'tencent':
                return new TencentCosStorage($config);
            default:
                throw new \Exception("不支持的存储驱动: {$driver}");
        }
    }

    protected static function getConfig(int $tenantId): array
    {
        if ($tenantId === 0) {
            // 平台默认配置
            return config('storage.default');
        }

        $tenant = \think\facade\Db::name('tenant')
            ->where('id', $tenantId)
            ->find();

        if (!$tenant || empty($tenant['storage_config'])) {
            return config('storage.default');
        }

        $config = json_decode($tenant['storage_config'], true);
        return $config ?: config('storage.default');
    }
}
3.7 统一上传入口
业务代码通过统一的上传服务上传文件,不需要关心底层用的是哪种存储。
<?php
// app/common/service/UploadService.php

namespace app\common\service;

use app\common\storage\StorageFactory;

class UploadService
{
    /**
     * 上传文件
     */
    public function upload($file, string $category = 'common'): array
    {
        // 1. 校验文件
        $this->validate($file);

        // 2. 生成远程路径
        $ext = $file->getOriginalExtension();
        $filename = date('Ymd') . '/' . md5(uniqid('', true)) . '.' . $ext;
        $remotePath = "{$category}/{$filename}";

        // 3. 保存到本地临时文件
        $localPath = $file->getRealPath();

        // 4. 获取存储实例(根据当前租户配置)
        $storage = StorageFactory::make();

        // 5. 上传
        $url = $storage->upload($localPath, $remotePath);

        // 6. 记录上传日志
        \think\facade\Db::name('upload_log')->insert([
            'tenant_id' => app('tenant_id') ?? 0,
            'path' => $remotePath,
            'url' => $url,
            'size' => $file->getSize(),
            'mime' => $file->getMime(),
            'created_at' => date('Y-m-d H:i:s'),
        ]);

        return [
            'path' => $remotePath,
            'url' => $url,
            'size' => $file->getSize(),
        ];
    }

    protected function validate($file): void
    {
        $maxSize = 50 * 1024 * 1024; // 50MB
        if ($file->getSize() > $maxSize) {
            throw new \Exception('文件大小超过限制');
        }

        $allowedExt = ['jpg', 'jpeg', 'png', 'gif', 'webp', 'mp4', 'mov'];
        if (!in_array(strtolower($file->getOriginalExtension()), $allowedExt)) {
            throw new \Exception('不支持的文件类型');
        }
    }
}
这个上传服务的核心设计是:业务代码只调用 UploadService::upload(),不关心底层存储。存储引擎的切换通过租户配置完成,不需要修改业务代码。
四、源码搭建教程:从零到运行
4.1 环境要求
操作系统:CentOS 7+ / Ubuntu 20.04+
Web 服务器:Nginx 1.20+
PHP:7.4 / 8.0(需 redis、fileinfo、curl、gd、pdo_mysql、bcmath 扩展)
数据库:MySQL 5.7+
缓存:Redis 6.0+
Node.js:16+
4.2 后端部署
# 1. 拉取代码
cd /var/www
git clone https://github.com/your-repo/diy-mall.git
cd diy-mall

# 2. 安装依赖
composer install --no-dev --optimize-autoloader

# 3. 配置环境
cp .env.example .env
vim .env
.env 配置示例:
APP_DEBUG = false
APP_TRACE = false

[DATABASE]
TYPE = mysql
HOSTNAME = 127.0.0.1
DATABASE = diy_mall
USERNAME = mall_user
PASSWORD = your_password
HOSTPORT = 3306
CHARSET = utf8mb4

[REDIS]
HOST = 127.0.0.1
PORT = 6379
PASSWORD =
SELECT = 0

[STORAGE]
DRIVER = local

[STORAGE_LOCAL]
BASE_URL = /uploads

[STORAGE_QINIU]
ACCESS_KEY =
SECRET_KEY =
BUCKET =
DOMAIN =

[STORAGE_ALIYUN]
ACCESS_KEY_ID =
ACCESS_KEY_SECRET =
BUCKET =
ENDPOINT =
DOMAIN =

[STORAGE_TENCENT]
SECRET_ID =
SECRET_KEY =
BUCKET =
REGION =
DOMAIN =
4.3 数据库导入
# 创建数据库
mysql -u root -p -e "CREATE DATABASE diy_mall DEFAULT CHARSET utf8mb4;"

# 导入初始数据
mysql -u root -p diy_mall < install/diy_mall.sql
4.4 设置权限
chmod -R 755 runtime public/uploads
chown -R www:www runtime public/uploads
4.5 Nginx 配置
server {
    listen 80;
    server_name your-domain.com;
    root /var/www/diy-mall/public;
    index index.php index.html;

    location / {
        if (!-e $request_filename) {
            rewrite ^(.*)$ /index.php?s=$1 last;
        }
    }

    location ~ \.php$ {
        fastcgi_pass unix:/run/php-fpm/www.sock;
        fastcgi_index index.php;
        fastcgi_param SCRIPT_FILENAME $document_root$fastcgi_script_name;
        include fastcgi_params;
    }

    location ~ ^/(runtime|vendor|\.env) {
        deny all;
    }

    client_max_body_size 50m;
}
4.6 前端编译
cd /var/www/diy-mall/uni-app

# 安装依赖
npm install

# 配置 API 地址
vim config/index.js

# 编译 H5
npm run build:h5

# 编译微信小程序
npm run build:mp-weixin

# 编译后的 H5 复制到后端 public
cp -r dist/build/h5/* ../public/h5/
4.7 配置定时任务
crontab -e

# 拼团超时检查
* * * * * cd /var/www/diy-mall && php think group:check_expire

# 订单自动确认
0 * * * * cd /var/www/diy-mall && php think order:auto_confirm

# 数据统计
0 2 * * * cd /var/www/diy-mall && php think stats:daily
4.8 初始化 SaaS 租户
访问 http://your-domain.com/admin 进入平台管理后台,创建第一个租户。租户创建后,系统会自动创建对应的数据库记录、存储目录和管理员账号。
五、边界与张力
全开源仿抖音 DIY 商城 SaaS 系统在工程实践中,有几个需要清醒认识的边界。
第一,DIY 组件的可维护性。 组件越多,前端注册表越大,维护成本越高。组件之间的样式冲突、数据依赖、终端适配都需要持续管理。建议初期只提供 8-12 种核心组件,后续按需扩展。
第二,多存储引擎的一致性。 不同存储服务的 URL 格式、删除语义、存在性检查方式都不同。系统需要在抽象层处理这些差异,保证业务代码的一致性。但某些高级功能(如七牛云的数据处理、阿里云 OSS 的图片处理)难以通过统一接口暴露。
第三,存储配置的安全性。 租户的存储密钥(AccessKey、SecretKey)存储在数据库中,属于高敏感数据。系统需要加密存储,且只在需要时解密。同时,密钥的展示应该脱敏。
第四,SaaS 的数据库连接数。 当租户数量增长时,数据库连接数会成为瓶颈。系统需要配置连接池、读写分离,甚至考虑分库分表。
第五,DIY 配置的版本管理。 商户修改 DIY 配置后,如果需要回滚到之前的版本,系统需要保留历史版本。这要求 page 表支持版本管理,或者引入独立的版本表。
结语:DIY 与存储是 SaaS 系统的"基础设施"
全开源仿抖音 DIY 商城 SaaS 系统的核心工程价值,不在于短视频或直播这些"前台功能",而在于 DIY 装修和多存储引擎这些"基础设施"。
DIY 装修让商户在不写代码的前提下自定义商城,这是 SaaS 规模效应的前提。多存储引擎让系统适配不同规模的商户,这是 SaaS 灵活性的保障。
#免责声明#
本站不存储任何实质资源,该帖为网盘用户发布的网盘链接介绍帖,本文内所有链接指向的云盘网盘资源,其版权归版权方所有!其实际管理权为帖子发布者所有,本站无法操作相关资源。如您认为本站任何介绍帖侵犯了您的合法版权,请发送邮件 linkshow2025@163.com 进行投诉,我们将在确认本文链接指向的资源存在侵权后,立即删除相关介绍帖子!
盘主最近主题

- 1《秘书工作手记》套装共3册 职场心法 公文写作 助你在办公室混得风生水起[pdf]
- 2清华大学:DeepSeek从入门到精通 & 职场赋能【高清版PDF】- 15.9MB
- 3《B站 - 职场生存图鉴:拿下令你心动的 offer》【2.90 GB】
- 4《职场高手的12堂工作汇报术(1) 》【5.00 GB】
- 5《职场新人必修课 职场新人路径 》【8.85 GB】
- 6《职场人性沟通术学会再学说话(1) 》【3.01 GB】
- 7《职场生存拿下令你心动的offer 》【3.02 GB】
- 8《黄先生的职场独家秘笈·求职篇 》 【10.72 GB】
- 9职场蔡老师人性沟通课【3.01 GB】
- 10《职场高手的12堂工作汇报术》【5.15 GB】
暂无评论